It’s wildflower sowing season – and with these homemade seed bombs from our gardening expert Michael Perry (known as Mr Plant Geek), your garden will be a rainbow of luscious blooms come spring.
Seed bombs – or Tsuchi Dango (‘earth dumplings’) as they were known in ancient Japan – are the perfect way for gardeners of all levels to get a head start on next year’s borders and pots. The hard clay protects the precious seeds from harsh winds and hungry wildlife, and together with the compost, provides them with all the nutrients they need to grow wild.
This recipe uses a mix of 11 delicious wildflowers, which will provide a treasure trove of nectar rich sources for pollinating insects – a key part of our Hives for Lives programme of vital initiatives to help care for our bee-autiful bees. The wildflowers will all grow at different times, providing a firework display of colour all the way through summer.
They’re super easy to make with just four ingredients, all of which you can get at your local garden centre or online. So, roll up your sleeves and get your hands dirty to help feed the bees!
Step 1: Gather your ingredients
For our wildflower seed bombs, you’ll need just four ingredients:
- 5 handfuls of peat-free compost
- 4 handfuls of air-dry red clay
- 1 handful of native wildflower seeds
- A splash of water
You’ll also need:
- A mixing bowl
- A baking tray
- Greaseproof paper
Step 2: Place the ingredients in a bowl
Place the compost, clay and seeds in a large bowl, ready to mix.
Step 3: Mix them all together
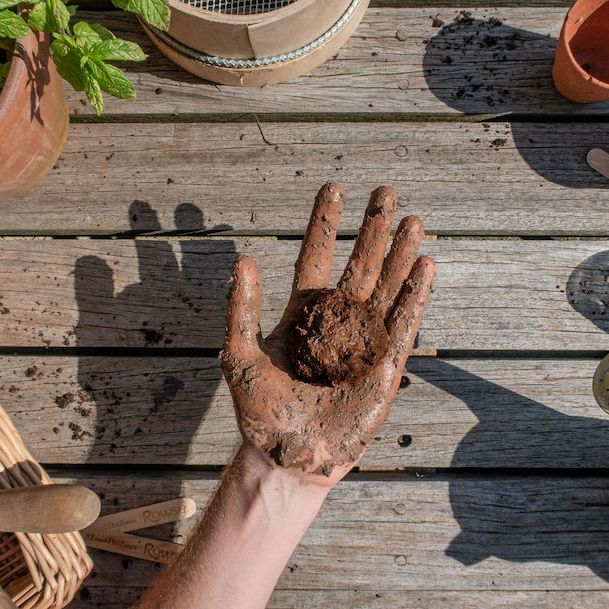
Now comes the fun part! Use your hands to combine all of the ingredients together, adding a splash of water if needed. You’re aiming for thick but mouldable consistency. The seed bombs need to hold their shape, so try to avoid adding too much water at once.
If you’re making this with your children or grandchildren, this is the mucky part they’ll love the most. It’s a bit like making mud pies!
Step 4: Roll them into balls
Once you’ve combined all your ingredients, roll the mixture into little balls. The size is up to you – these ones are slightly larger, but you can make them smaller, similar to the size of a golf ball, if you’d prefer to scatter them over a larger area.
Step 5: Place your seed bombs on a tray and leave them to dry
Place your seed bombs on greaseproof paper, ready to dry. Use a baking tray if you plan to move them elsewhere.
Leave for 4 to 5 days, or until they’ve completely hardened (check for soggy bottoms!). Placing them out in the sun, or near a source of warmth, will speed up the drying process.


